Interactive Project with AR
Overview:
Into the Animal Cell is the Grad Project I did during my year at Vancouver Film School. It is a 360° interactive experience to reinforce what has been learned in class about the Animal Cell. It is meant to help students between the ages of 13 to 17 remember the names of the Organelles inside the Animal Cell as well as their functions. This project comes from my interest in education and the desire to create something that could be used in a museum.
Year: 2019
Type: Product Design
School: VFS
Role: User research, Research analysis, UX Design, UI Design, Prototype, Script, Storyboard, Animation, Developer
Process:

Tools:

Understand:
Research: My project started with the research for my Target User. I looked for the official BC curriculum to be as accurate as possible. There I found that the first time students learn about the cell is in 8th grade, revisiting it later in 11th and 12th grades.
Then, I researched how students are introduced into this Topic, and I found that the amount of information increases considerably when they are taught about the Eukaryotic Cells.


Opportunity: Too much information to learn in a small amount of time.
Once I defined my target audience and the opportunity I could work on, I continued my research in three streams. First, academic, everything I could gather about the Eukaryotic Cells, in specific about the Animal Cell. Second, design, I researched as much as I could about persuasive design, gamification and games in education. Third, Interviews, where I made 1 on 1 interviews with students and teachers from this subject. It was from these interviews that I found the problem I could work on.
Problem: Students don’t remember what they learned in class, this may be because it is too much information to learn in a small amount of time, and because they usually use the same exercises.
Define:
Design Sprint: Following loosely on the Design Sprint model, me and my mentor set to define the core problems I identified during the research, as well as the time where these problems would take place during the student’s experience. We identified the Design Goals I was aiming for to generate an idea that could solve most if not all of the problems. Once this was defined, we brainstormed different ideas for the final project, and defined the final one from the best two we came up with.

Ideate:
I first wrote the script to put down the idea of the story along with descriptions. Once I was happy with the order, I draw the Storyboard to have a visual script along with the actions and dialogues. At this point I divided the story in different sections, this planning helped me later when I started animating in Unity.


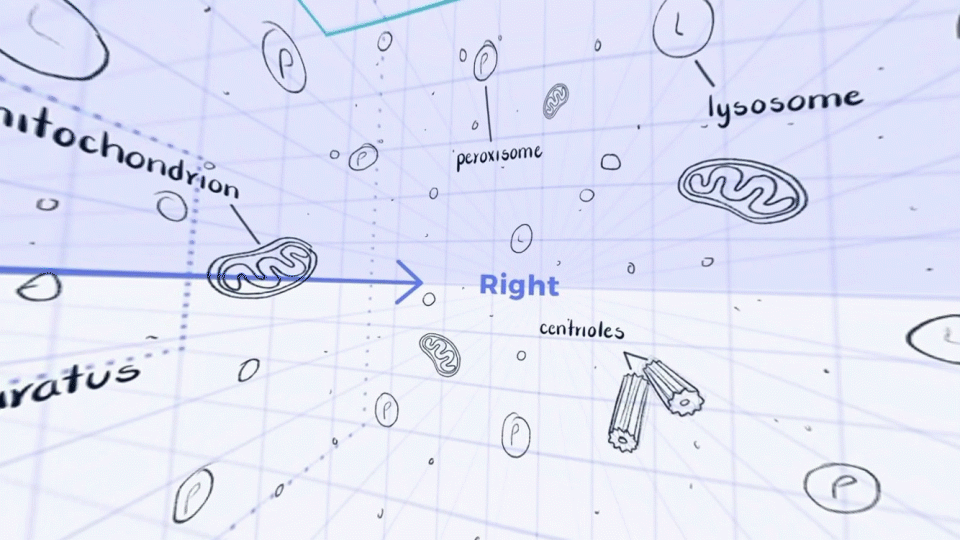
For the Project’s style I was aiming for a friendly mood, with bright colors and clear silhouettes. The colors of the Organelles (little organs) are bright and saturated to pop out from the background which is dark with blue hues to push it further and fake a sense of depth.

Lo-Fi Prototype + Validate:
I did a Low Fidelity version of the project using Google Street View. This would help me make early user testing to check the idea would be appealing and easy to understand.
Hi-Fi Prototype:
Once the idea was ready to go, I made all my assets in Procreate and Photoshop, where I could work with textures and clear silhouettes.
Following the design process, I moved all the production to Unity, where I imported my 2D assets and positioned them in a 3D environment. I animated them there because Unity allowed me to create different animations using only one drawing with Anima 2D.
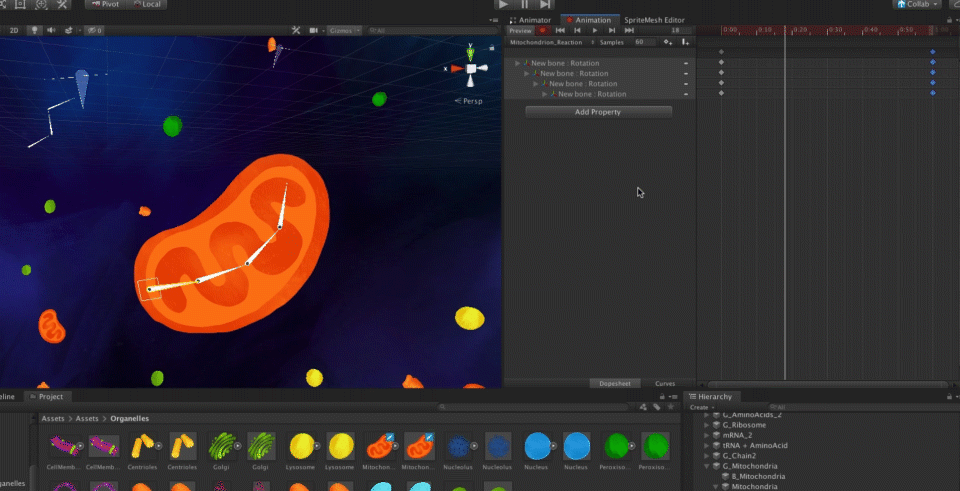
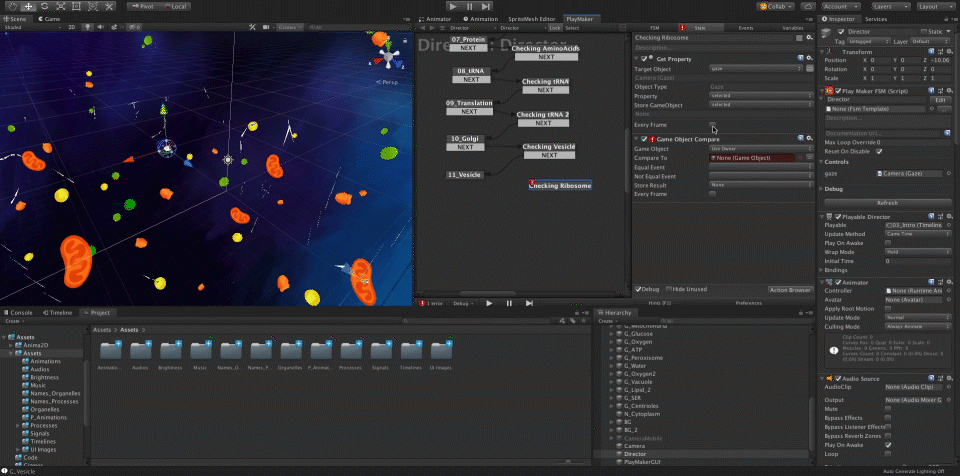
For the Storytelling I used Unity's timeline, where I would put together the different sections of story I had already set in the Storyboard. Eventually, I would have 14 pieces of video to connect and create the whole story.
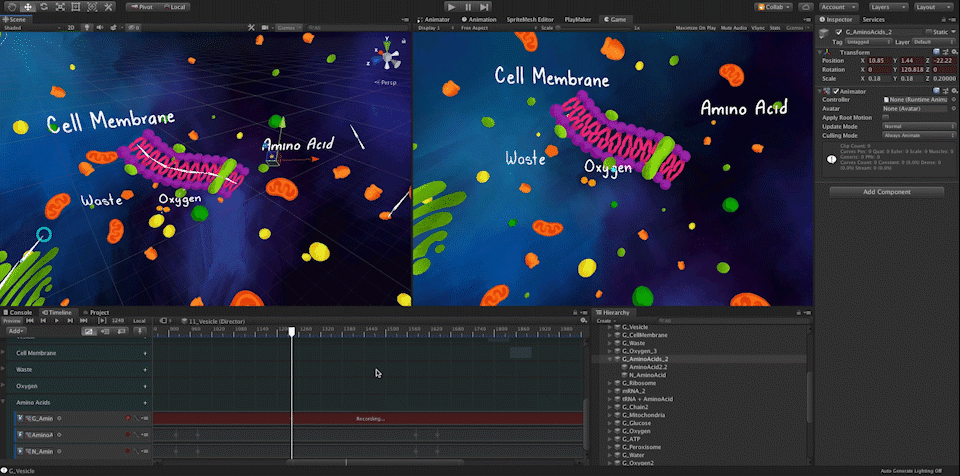
Finally, for the interaction with the user I used Playmaker, where the previous pieces of video connected with the transitions. It is in these transitions where the experience would wait for the user to look to at the next Organelle in the story for it to continue.
*At this point I should add that the camera is controlled with scripts from ARKit. This is because as the experience was aimed to be used in a mobile, the ARKit would let us use the phone’s accelerometer.
Final Validation + Implementation:
During this final user testing I received useful feedback to improve my project. After implementing these feedbacks, users were able to follow the story with no problems.
- Change the size of the Organelles to improve depth.
- Reduce their names so users won´t get confuse to what Organelle it belongs.
- Brighten the next Organelle in the story to know where to look next.